
All computers have the software available listed below.
- To log in to a UTS College computer, press any key at the login screen.
- Read the 'Condition of Use' and press 'OK'.
- Enter your username and password:
- Username: Your student number,
- Password: Your password, and
- Click the arrow button to finish.
- To logout from a UTS College computer, click the start button on the bottom left corner.

- Click the icon highlighted below.

- Click 'Sign Out'.

Cloud printing
You can send printable documents directly to the UTS Print Queue via a web page.
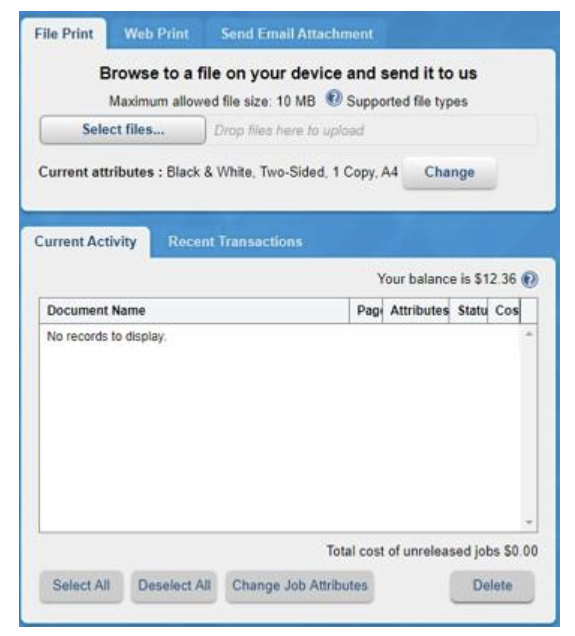
- Navigate to myprint.uts.edu.au
- Log in with your student ID number and password.
- Click Select files
- Choose your document to upload, and once uploaded wait for your document to finish processing.
- Go to any print release station or printer with an ID card reader to release your job.
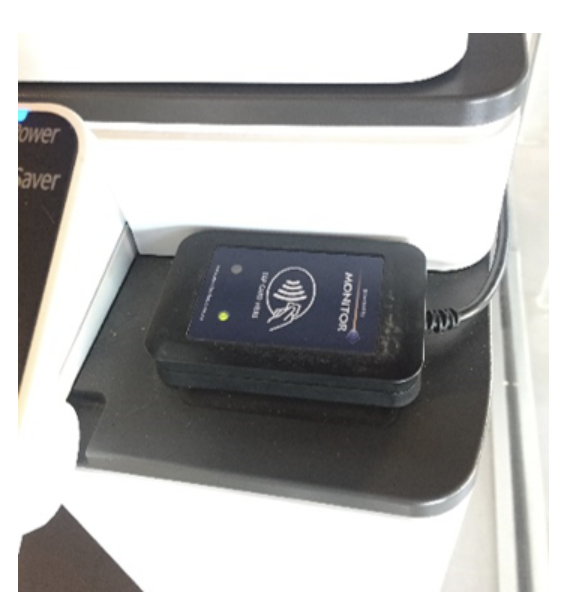
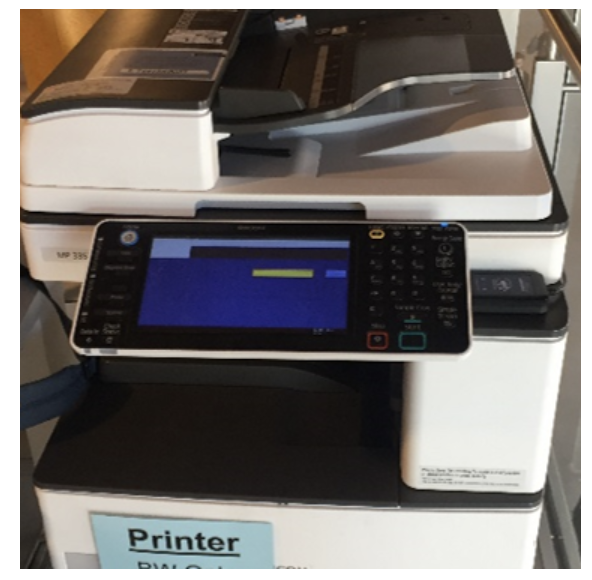
Releasing a print job
Once you have submitted your print job you can release it from the Cloud Print Queue at a Print Release Station or printer with an embedded ID card reader.
Tap your student ID card on the card reader (if available) at the printer. Release your print job using the instructions and prompts on the screen.
Adding value to College Cloud Print Account
Recharging funds via MyMonitor Web Portal
Step 1: Login to MyMonitor using your Student ID username and password.
Step 2: Click on the Add Value button to begin adding funds to your MyPrint Account.

Step 3: Select the amount that you want to add to your account, or select ‘Other Amount’ and enter a value in the text box. (Minimum $5.00. Maximum $100.00.)
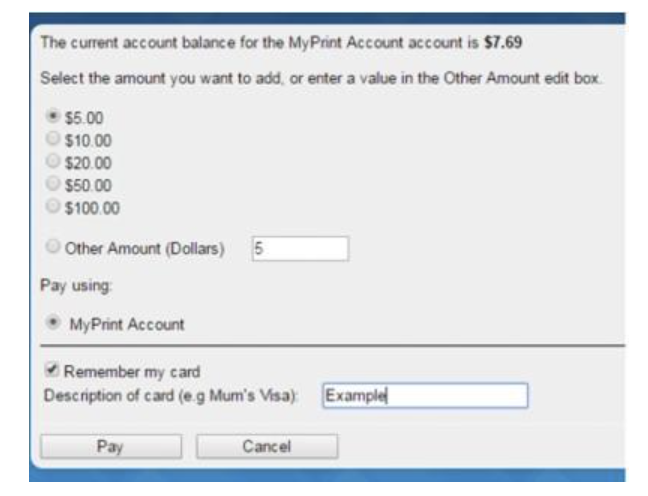
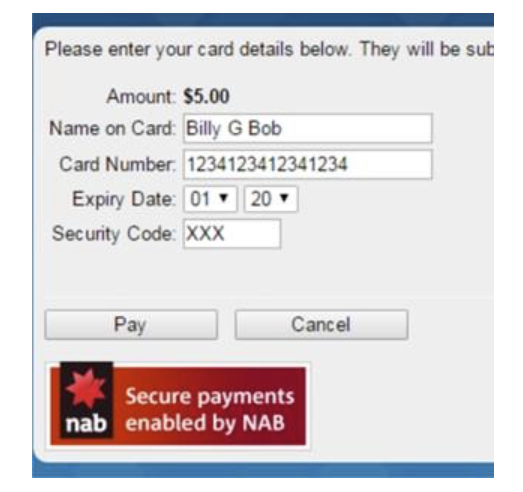
Step 4: Enter your credit card details, and click ‘Pay’.
Step 5: Once you have paid, your MyPrint account will immediately be topped up and you will receive a receipt, which you can choose to print.
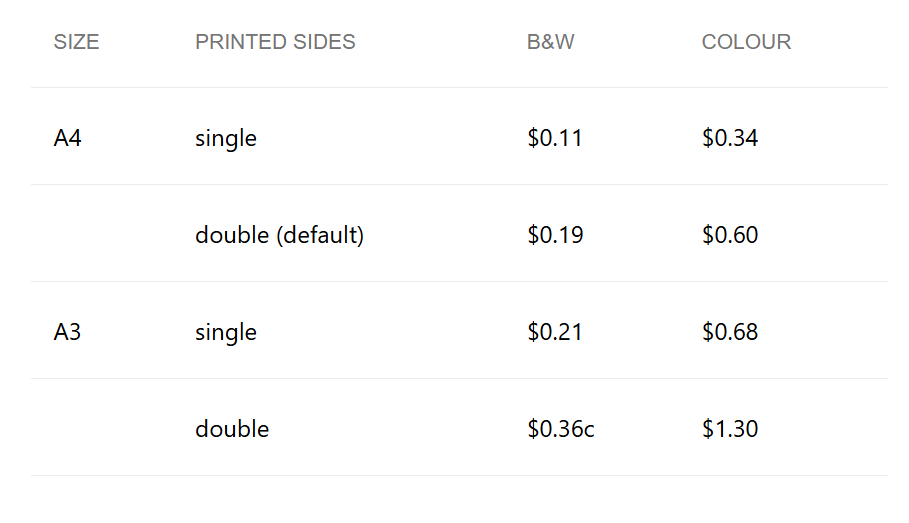
Printing costs
In order to make it comfortable for all students to use the UTS College computers, please follow these common-sense rules.
- Do not bring in food or drinks as there are common areas located on every level,
- Do not change settings or modify the system,
- Do not remove cabling or hardware from the systems,
- No malicious attempts to damage system physically or with malware,
- Any issues regarding malicious damage will result in failure to comply with policy,
- Do not play games or other leisure activities, everything is monitored,
- No sharing of passwords, log out after each use,
- No connecting to Ethernet ports located across campus,
- Keep the area clean and tidy as it is shared by everyone,
- Please throw all rubbish in bins provided,
- Breaches of policy will be dealt with in accordance with the Non-academic Misconduct Policy.